
There are many great tools available for A/B or multivariate split testing your landing pages. It turns out, however, that only 48% of marketers perform any kind of split testing at all. That is shame, because you could be improving your profitability without increasing your ad spend.
We get that some split testing services are expensive and we get that you’re not sure what to do our how to start. Today we’ll take a look at Google Content Experiments, a free built-in multivariate testing tool from Google Analytics.
DISCLOSURE: Some of the products mentioned in this post may contain affiliate links that at no additional cost to you, we may earn a small commission. Importantly, we only promote products that we use ourselves.
Major benefits of Google Content Experiments are:
- Built into Google Analytics – the tool is almost certainly already installed on your website
- Easy to deploy and manage – we’ll show you how
- No degree in statistical analysis required – Experiments declares a clear “winner” for you
- Works with any website – if you can copy a page and make minor changes, you can use Google Experiments
Drawbacks of Google Content Experiments:
- If you have bad landing pages to begin with, or none, this isn’t going to help
- inconsistent url – you will need to get creative with different url endings for each page variation
- You will need to track what you changed in each page manually
Creating Your Page Variations
We are going to assume at this point that you already have a Google Goal set up in Analytics that either (a) tracks conversions based upon a thank-you page that loads after form submissions, or (b) tracks conversions based upon a custom form submit event. If you’re selling online this may also be implemented through Google Analytics Ecommerce tracking.
First you need to create one or more variations of your landing page. Start by making an exact copy of your landing page and save it to another url. To keep it simple you can simply add a “-b” and “-c” etc., to the end of the original url.
You’ll end up with 3 pages in this example:
- mywebsite.com/amazing-offer
- mywebsite.com/amazing-offer-b
- mywebsite.com/amazing-offer-c
Now you have 3 pages that are all identical and need to create subtle variations in versions b and c. Open each page, in turn, and make ONE, and only one change. For consistency we suggest you change the same element in both new variations. Stuck on what to test?
5 landing page elements to test that often lead to more conversions:
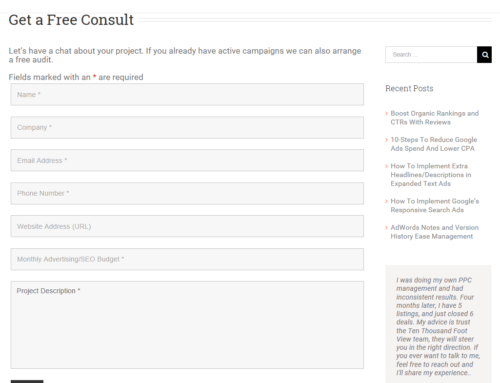
1. Adjust the number of form fields
More form fields tends to increase the quality of leads and reduce the number of conversions; but not always. Testing this will help you find the right balance between lead quality and lead volume.
2. Test submit button copy
Specific button copy can lead to a higher conversion rate. Instead of “Register” try “Sign Up For Free Lesson” and see what happens.
3. Test placement of your call to action
Usually we hammer home how your CTA needs to be above the fold, and that is true most of the time. That said, when you have a complex offer, like a long-term subscription service, a lower CTA can often be more effective.
4. Test different “trust factors”
There are a variety of trust factors you can include on your landing page such as testimonials, “big name” clients, certifications, awards, earned media reviews, and more. Try reorganizing this content, particularly if some of this will appear above the fold. Also consider making your testimonials more “real” by including a photo of your client or even a video testimonial.
5. Test different headlines
Is your headline perfectly clear and concise? Is there a better way to say it? Try different headlines that state the same offer or value proposition, but say it differently.
Have your page variations ready to go? Great! Let’s move on.
Creating the Experiment in Google Analytics
Alright you have your pages ready to go and you have a Goal set up in Analytics, time to create your experiment. Login to Google Analytics, from the Behavior menu choose Experiments, and click the Create Experiment button.

Basic Settings
Type in an appropriate name for your experiment, we recommend including the offer, page, and element you’re testing. If you create many experiments (and when you get going you’ll want to) this will help keep everything straight later on.
Next select the metric you want to track – this will be the aforementioned Goal that tracks conversions for your page. If you haven’t set that up yet you can also do that here.
Optionally you can experiment with less than 100% of the traffic, for instance if your page variations include a radical (low confidence) change that is expected to generate a low conversion rate. Why you would do such a thing is beyond us?
We recommend turning on email notifications, especially if this is your 1st experiment – it’ll help you keep on top of any issues and results.
Advanced Settings
By default Google will dynamically adjust the volume of traffic that is sent to each page variation based upon conversion rate. This is generally preferred because it’ll increase the overall conversion rate of your page as the experiment runs. You may, optionally, turn this off, which can be helpful if you don’t get a lot of traffic volume to your page… i.e. you will be able to get clear results faster.
Setting a minimum time the experiment will run can be helpful if you want a more definite result. This signals Google not to declare a winner until the experiment runs at least this long.
The confidence threshold tells Google when the experiment can declare a winner. If you are expecting only small incremental improvements (say a 2-3% increase in conversion rate) you might want to increase this, but 95% is just fine in most cases.
When you’re happy with your settings click Next Step to move on.
Configure Experiment
Here you will add the urls for the original and each variation of the landing page. First select the appropriate security level for the page (http or https) and input the full url for the main page. Under Name for the page we recommend using a description of the product/service/offer that appears on the page. We recommend checking the “consolidate experiment for other content reports” box. This simply means that in your normal Google Analytics reports the split test analytics will show up as if they are all under the same page for easier reading.
Next add each of your page variations ensuring that your Name for the page includes a description of the variation. An example of this might be ‘using button text “click to claim your free beer!”‘ or ‘moved CTA form to bottom of page.’

Click on Next Step to move on.. we’re almost ready to launch.
Setting Up Your Experiment Code
Google will now provide the experiment redirection script. Inserting the script on your page is simple but many people get this wrong so pay attention. Open your ORIGINAL PAGE only, and paste the code immediately after the tag. Do not, and we repeat, DO NOT place this script on your landing page variations, it must be on the original page, and only on that page. All done? Great, click Save Changes, Next Step, and Google with verify everything is set up correctly. Good to go? Click Start experiment and you are live.

If you’re having trouble at this point we recommend checking out Google’s own instructions for Experiments.
Monitoring & Results
Give the experiment at least a day to run and then you can come back to experiments and review the data. In time you will, hopefully, start to see a clear trend – one of the page variations will be converting better than the others. If you left dynamic traffic adjustment turned on you will also see that the best performing page is getting greater traffic volume. When Google declares a winner you will receive an email notification (assuming you turned on email notifications). Otherwise you can simply check in periodically.

While the experiment runs you can make changes such as disabling under performing pages.
Ending The Experiment
You can stop the experiment when you’re convinced of a result, or if you see no definitive difference between variations after some time has passed. If you don’t, Google will automatically stop the experiment after 90-days.
Don’t forget at this point that all future traffic will go to the original landing page. If one of your variations had a better conversion rate you will need to update your original page with the appropriate changes. We’ve seen a lot of people forget to do this and wonder why performance hadn’t improved.
Summary
Google Content Experiments is a great free alternative to other methods for split testing pages. If, however, you don’t already have a good landing page to work with, or the time/inclination to deal with this there are other solutions.
Consider checking out Lead Pages, Unbounce, Optimizely, or our favourite Instapage. These services offer a variety of ways to generate pages and manage split testing automatically. Too complicated? Drop us a line, we can help. We offer a host of our SEO management services.