Note: Gmail campaigns are no longer available. This functionality is now included in Discovery campaigns.
A while back, Google removed our ability to target email domains with Gmail ads. This, effectively, put the kibosh on targeting your competitors’ user base. Now Google is giving us a little something back.
Google has rolled out new Gmail campaigns with website visitor remarketing options.
In our experience so far, Gmail remarketing works superbly, far outperforming similarly targeted GDN remarketing. If you’re not already running Gmail remarketing now is the time to get started.
In today’s article, I’m going to run through the entire Gmail campaign setup process, explain the new features, and give you some tips for success.
Gmail Campaign Sub-Type
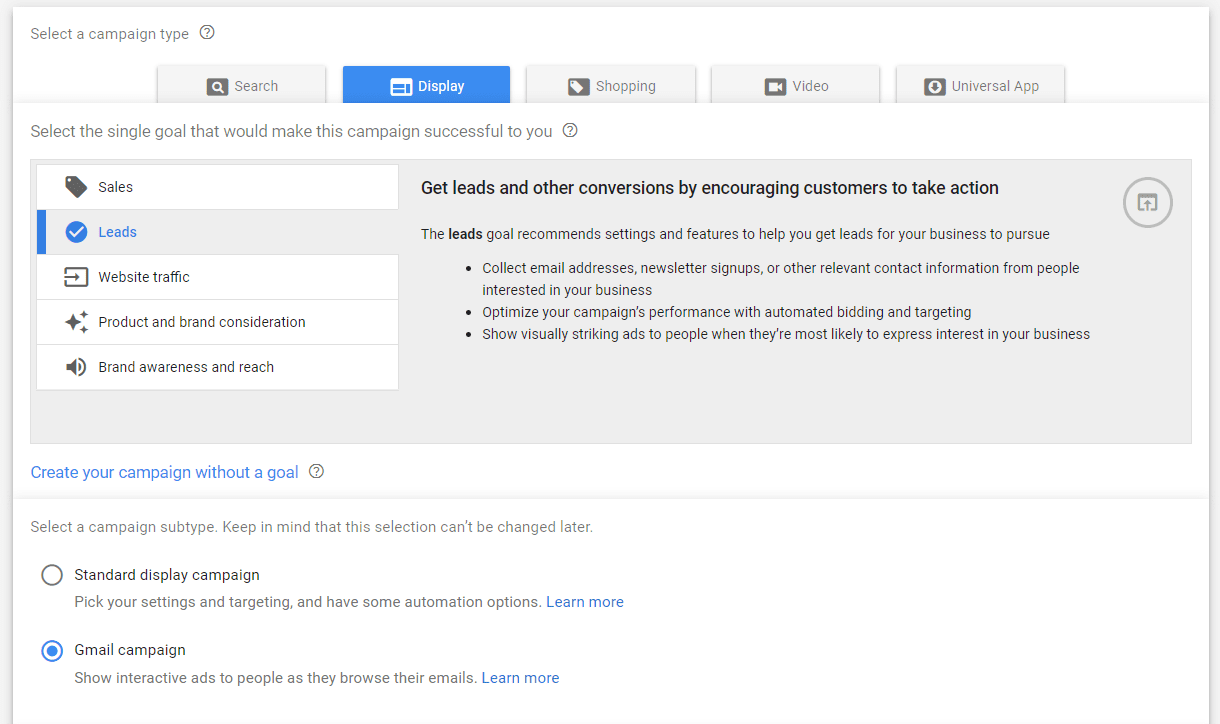
First, you can no longer add Gmail targeting by adding the mail.google.com placement and Gmail creative type. Gmail campaigns now must be created in the new AdWords interface by building a new display campaign and then selecting the Gmail sub-type.
Gmail Campaign Settings
Most settings are pretty standard fare. I recommend focusing on conversions and using manual bidding with ECPC turned on (assuming you expect at least 15 conversions per month). For budgeting, use a figure of you’re comfortable starting with. If your campaign hits it out of the park you can always raise your ad spend later. For the delivery method, I would start with “standard” but consider changing to “accelerated” later if you want to maximize exposure.
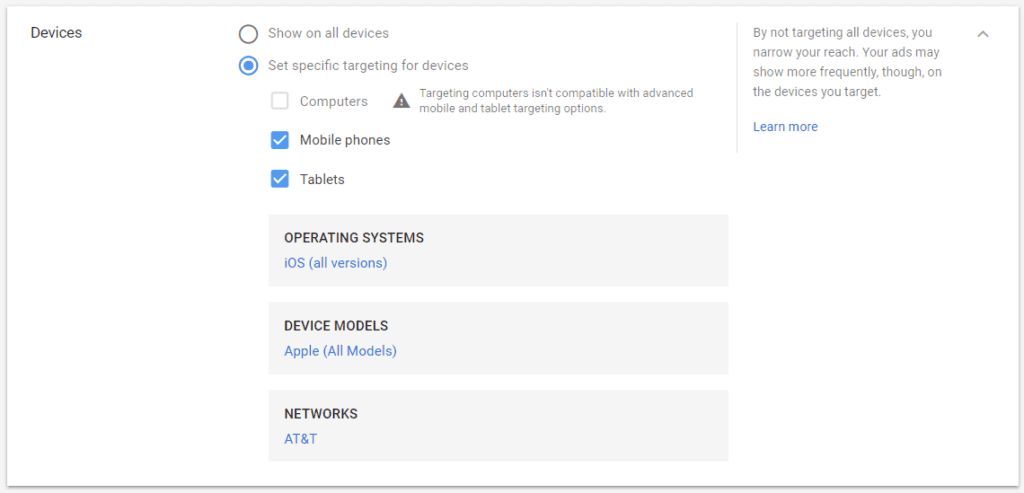
One major new feature is the ability to use granular mobile device targeting. Let’s say you’re selling iPhone accessories. You can use your budget more effectively by targeting only iOS operating systems or Apple device types. You can also choose different network (carriers) or Wi-Fi only. Note that if you choose custom targeting you won’t be able to target computers in this campaign.
Gmail Ad Group Settings
Under ad group settings you will, of course, ad an ad group name and set your audience targeting.
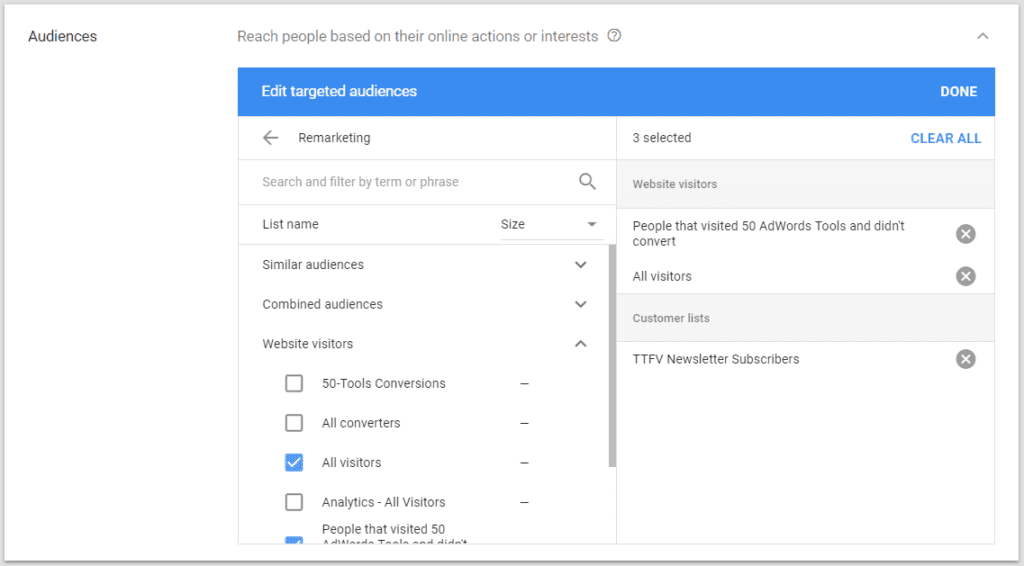
To target website visitors, open up the audiences dialogue and add your remarketing lists. If you have contact list audiences, you can also add them here. Importantly, do not add any similar audiences! Just as important, set Automated Targeting to “No automated targeting.” These two settings are crucial because targeting these groups will essentially use most of your budget to run ads for people that aren’t even on your remarketing lists.
You also have options to target demographically and by keywords. I would skip both settings for now but consider activating them later if you’re not seeing a solid cost/conversion.
For ad group bids I usually set a starting bid about 25% higher than the recommended bid. If you fill your budget you can back off of this some later. No recommended starting bid? Try $1.
Gmail Creatives
The Gmail ad creation tool has changed some and there are several new features to be aware of. Of course, you can still upload Gmail ads you’ve crafted externally, but Google has made the native ad creation process more powerful.
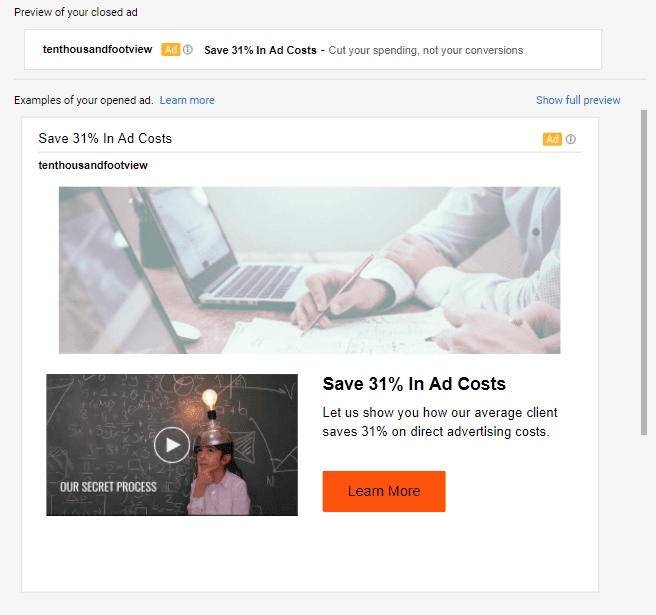
The company name, headline, description, and URL fields are straightforward enough – same as before. With the new Gmail ads you can add a square logo, and landscape (slightly different aspect ratios) header & marketing images. In addition, you can now include a Youtube video!
You can also now add catalog photos to highlight best selling products you offer. All of this content can be generated with a landing page scan, upload, or from Google provided stock content. I generally advise against using stock content because Google has the habit of discontinuing it leaving you scrambling to replace your ads later on.
There are a couple of more new features to explore before we wrap up.
You can create a custom teaser with a different headline and/or description vs. the full version of your ad. And, you can now use a custom call-to-action button text and (accent) color. As usual, ensure you make at least ad variations for split testing before saving your ad group.
After Saving Your Gmail Campaign
One thing we really dislike about the new interface is that certain settings are not available during campaign creation. You literally need to save your campaign and then go back in to configure these hidden features.
Once your campaign is saved, go back in, choose your ad group, and then settings, and then find the additional settings link.
Turn on custom bids for audiences and save that then click on Audiences. You can now set individual bids for each audience depending on how you value each visitor or contact.
Next click on Exclusions. Here you should add any/all lists of previous converters or other lists that shouldn’t be targeted with your ads.
Okay, now we’re done. Come back in about 24-hours and see how your campaign is running. Note that if you are importing conversion goals from Analytics, that it may take up to 24-hours after you record a conversion in Analytics for it to show up in AdWords.
Summary
Google has made good progress with Gmail ads. While it was very disappointing when they discontinued domain targeting, the new remarketing options do work very well. I hope you’ve found this post helpful. If you have any questions you can comment below or contact me directly through our company contact form.

