When your Google Shopping campaign isn’t cutting the mustard it’s time to try something new. If you’ve tried Smart Shopping or ROAS bidding and you just can’t make the numbers work, this post is for you. Or if you still simply don’t trust Google’s automating bidding, this post is for you.
If you’re just getting starting with shopping ads, this post probably isn’t for you, at least not yet.
Today I’m going to go over 5 popular advanced shopping strategies designed to grow your profits.
1. Funnel Stage Campaign Splitting
This strategy has been around nearly as long as shopping campaign priorities. It is probably the most complicated strategy to understand but is also the most effective when implemented correctly.
The main benefit is that you have much more granular control over what you’re bidding at different levels of interest. In other words, you claw back some control over keyword bids.
Keep in mind, that if you’re using any kind of automated bidding such ECPC, ROAS, or Maximize Conversion Value, that Google is already taking care of this to a large degree. And, you can easily verify this by reviewing your average CPCs in your search terms reports. This will be a lot more clear if you have things properly segmented into ad groups and product groups.
Want to do it anyway? Okay let’s go…
Levels of Intent
For simplicity, we’ll say there are 3 levels of intent.
Prospects at the top of the funnel (awareness) are very unlikely to buy during their first visit so you can expect very low conversion rates. Prospects at the bottom of the funnel (purchase) are very likely to buy immediately so you can expect very high conversion rates. Correspondingly, when investing into PPC, you should bid low for the top of funnel and high for the bottom of funnel search queries.
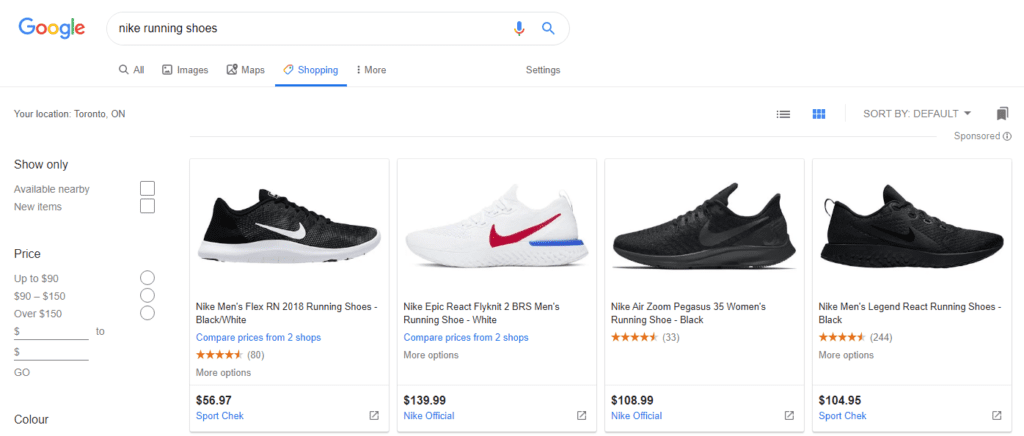
Here are sample search queries for each level if you were selling running shoes.
- Awareness – virtually no specificity about the product or intent – shoes [low bid]
- Interest/Consideration – specific with a brand of shoe but still fairly generic – Nike running shoes [medium bid]
- Purchase – extremely specific and will include model name, SKU, reseller name, or “buy” keywords – order Nike men’s downshifter 9 running shoes [high bid]
Now, of course, with shopping campaigns, we cannot positively target and bid on individual keywords. All we can do is identify “low-quality” search queries and block them with negatives.
But what is low quality, really? Is it wrong to bid on “awareness” level search queries? Not at all, because these search terms will get people visiting your site, the same people that are likely to buy later on. You can retarget to these people and they may simply come back on their own when they’ve figured out which product they want to buy. The trick is to bid low so that you don’t blow through your budget driving a low ROAS for these queries.
On the other hand, wouldn’t it be great if we could bid higher for search terms that are more likely to convert?
Of course, but how do we accomplish this?
We can segment the funnel through a combination of campaign priorities and negative keywords.
Campaign Creation
You need to set up 3 duplicate campaigns as a starting point. They should all contain the same ad group and product group structure. If you already have an efficient campaign I recommend copying it and pausing the original. You may want to go back to it if this doesn’t work out.
Set, low, medium, and high priorities for each of the respective campaigns.
Next, you need to add your negative keywords. I recommend creating one global list for everything you’re 100% sure you want to block. These may include brands you don’t carry, queries that include words like “how-to” or “instructions” and queries like “near me” when you only sell online. Apply this list to all campaigns.
Now comes the tricky part.
Segmenting Your Negative Keywords
This will be counter-intuitive, but you want your high priority campaign to run for the most generic search terms (top of the funnel) and your low priority campaign to run for the most specific search terms (bottom of the funnel).
For this reason, it’ll be helpful to name them accordingly:
- High Priority – Awareness
- Medium Priority – Consideration
- Low Priority – Purchase
To accomplish this, we need to add develop 2 negative keyword lists and apply them as follows:
Product Names
This list will contain specific names for products offered. For the shoe store, this list may include Tanjun (a specific Nike model name) and 0600089255961 (the model number for that same shoe).
Brand Names
This list will contain the brands you carry such as Nike, Adidas, Saucony, etc.
Applying Your Keywords and Bids
Follow the table below to apply your negative keyword lists and bids.
| Campaign Priority | Campaign Name | Negative Keywords | Bid Level |
| Low | Purchase | None, other than your global list added earlier | High |
| Medium | Consideration | global list + product names list | Medium |
| High | Awareness | global list +product names list + brand names list | Low |
Here are some examples of how this will work:
- When somebody searches for “running shoes” they will see an ad from the high priority – awareness campaign, because “running” or “shoes” are not in any of the assigned negative lists
- If somebody searches for “Nike shoes” they will see an ad from the medium priority – consideration campaign, because “Nike” is in the brand names negative list
- Whenever somebody searches for “Nike Tanjun” they will see an ad from the low priority – purchase campaign, because there is a negative for this product in both high & medium priority campaigns
Finishing Up This Strategy
Make sure you apply a shared budget across these campaigns. Don’t use automated bidding here (even ECPC), as it’ll override the whole point of the exercise.
Monitor performance closely, adjust bids as needed and refine your negative keywords regularly. This is a long-term strategy that takes time to work. Plan on 30-60 days before things are really performing well.
2. SPAGs (Single Product Ad Groups)
SPAGs follows a similar methodology to the now outdated SKAGs (Single Keyword Ad Groups) technique of granular keyword segmentation.
In a nutshell, the tactic involves breaking all of your SKUs into individual ad groups. This allows precise control of negative keywords, device bid adjustments, and other ad group level settings.
The main benefits are that you have much more precise control on a per SKU basis, and you can also view individual search terms reports per SKU. This can be useful in optimizing your product feed titles and meta descriptions.
First, I’m going to say that I’m not generally a fan of this strategy. For the vast majority of advertisers, there is little point in breaking up every single SKU into a unique ad group. However, there are some circumstances where this does make sense.
Here are the qualifiers:
a) You have less than 100 SKUs
If you have more than 100 SKUs this will quickly become a management nightmare and not be worth it. Shopping campaigns are largely automated for a reason.
b) Most of your products are uniquely different from your other products
The whole point of this strategy is so that you can build product-specific negative keyword strategies. If you sell 50 products that are simply different colors or models, there is little point in trying to segment them using this strategy.
c) You have a good size budget for your campaign
This is relative, but if half of your SKUs only get a few clicks per week there isn’t much point in creating all of this bloat.
Qualified? Okay, let’s continue…
Naming SPAGs
Having unique and clear names for each ad group is important for ongoing management of the campaign. I recommend using the format product_type – product_ID – product title so that you can easily sort by product_type. You can use an alternative if you don’t use product_type as your main method of categorization. Or you can use the product title first followed by product_ID and product_type. Some advertisers like to include the price, however, I wouldn’t recommend that if your prices change frequently. You’ll play catch-up for a while and then probably give up on keeping things up to date.
If you sell auto accessories an ad group title might be something like: Windshield Wipers – M1246636 – Michelin RainForce All Weather Performance Wiper Blade, 26″ – $19.95
Campaign Organization
Some “SPAGers” (if there is such a thing) recommend splitting up your major product categories into separate campaigns. I’m not a big fan of this, and instead, would use separate campaigns to prioritize sale items, top-selling items, or different ROAS targets. In other words, use normal best practices for campaign organization.
Automating the Build
Building SPAGs can be very time-consuming if you’re dealing with more than a few dozen SKUs. Add to that the fact that you will need to continue to build SPAGs every time you change or add new SKUs to your feed.
You might want to consider investing in a tool that will automate the process. The one 3rd party tool I know of that does this is Optmyzr, although I’m sure there are others. Theoretically, you could get their free trial, build your campaign, and then discontinue the service if you don’t find it useful for ongoing management.
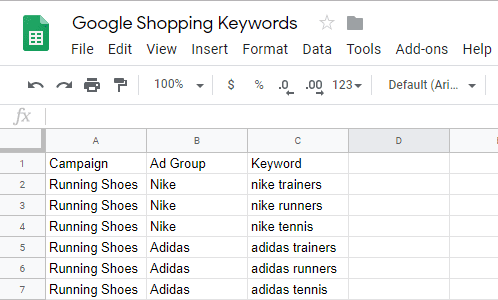
Another option is to build your SPAGs campaign in a spreadsheet and import it. To get started you need to export your list of products from Google Ads. Open the sheet and reorganize everything into ad groups using cut and paste.
In the ad group column, you can use a formula such as =A1&” -“&A2&” – “&A3 to build out the ad group name from the product ID, type, and title fields.
You can then simply import the sheet back into Google Ads or paste the data into Google Ads Editor and sync it. Once that’s done you will still need to go into each ad group and select and bid on the relevant product. And don’t forget to exclude all other products for that ad group!
If this all sounds way too complicated, you probably aren’t ready for SPAGs yet.
Optimizing SPAGs
Optimizing SPAGs works the same way you’d optimize any shopping ad group. Monitor your search terms and regularly add low performers as negatives. Keep an eye on devices and adjust for optimal ROAS (not needed if you use Smart Bidding). Ensure you add all relevant audiences using “observation” and set bid adjustments as needed. Oh, and don’t forget to maintain your base product bids if you’re doing old school manual or ECPC bidding.
3. Keyword Targeting Shopping Script
This is very new and very cool! The script was written by Daniel Gilbert of Brainlabs and highlighted recently on Search Engine Land.
The script works by using a list of target keywords you load into a Google Sheet. Whenever your shopping ad is triggered by a non-matching search query, that search query will automatically be added as a negative keyword. Furthermore, the original search query will be chopped into individual words and those will all be added as negatives. Importantly, no negatives will be created that would block any of your positive keywords.
Now, while this sounds amazing, I would caution you to not use this for a brand new campaign. Being too conservative or just not being thoughtful will dramatically restrict your shopping campaign’s potential to scale.
Instead, use conversion data from a mature shopping campaign to rebuild or divide it into two or more parts.
How To Configure Your Campaign(s)
If you want to keep things simple you can create just one campaign using your target keywords. You will get the benefit of automatically blocking all search terms you’re not interested in.
Alternatively, you can use a combination of campaign priorities and bids to segment your campaigns based on high, medium, and low-value keywords. This would work essentially the same as the funnel stage campaign splitting strategy described above.
Or, a little less complicated, would be to have one campaign using the script with high bids and priority for your bread and butter keywords. And, a second campaign using a standard set up for keyword discovery. Over time you can identify new “winners” and add them to your scripted campaign. This is classic keyword conquesting, only for shopping instead of search.
Where to Get the Script?
You can grab the script and full instructions from Search Engine Land’s post.
4. Change Your Target ROAS
We work with a lot of online shops and frequently find that prospects consider target ROAS to be a fixed number. A prospect will argue that they must make a particular ROAS to be profitable on each sale.
There are a lot of problems with this kind of thinking. First, if you don’t explore different rates of return, you won’t know what’s optimal in terms of profits. What’s better 500% ROAS and $100,000 in sales, or 400% ROAS and $200,000 in sales? Well if you make a 50% profit margin that works out to $30,000 in the first scenario and $50,000 in the second scenario.
Sometimes by adjusting your target ROAS up or down, you can achieve better results.
More importantly, some advertisers are short-sited, only considering the immediate profit from sale. The most successful eCommerce companies often make very little profit or even take a loss on their shopping campaign sales. How is this possible?
Well, it’s really quite simple and all based on long term thinking. If you know your average client lifetime value is 12x the initial order value, it’s easy to see how using shopping as a lost leader makes perfect sense.
In the scenario above, by lowering your ROAS from 500% to 400% you are able to acquire essentially twice as many new customers while also making more initial profits, despite a lower profit margin.
Understanding this is absolutely crucial. I can’t tell you how many times we’ve audited a subscription box company’s shopping campaign and seen a pathetic 10-20% impression share. All this in the name of getting a 40% profit on the first order while complaining about not being able to scale – totally nuts!
5. Use Ad Customizers Instead of Shopping Ads
This really isn’t a shopping ads strategy so much as an anti-shopping ads strategy.
Using ad customizers you can automate search ads based on a spreadsheet of your inventory. The main benefit of this approach is you have full control over target keywords and creatives. Keep in mind that search ads do not show up at the top of Google results, nor do they contain a product image. These are major disadvantages to this approach.
One scenario where this makes sense is if you simply can’t make your shopping ads profitable. Another scenario is if your shopping ads are crushing is and you want to double serve for top queries.
Building your Datasheet
First build your Google sheet, loading all the items you want to advertise into rows. You can use this template from Google and change anything you want. Google also offers a solid help article on how to do this.
Depending on what information you want to include in your creatives you might include a sale price, discount %, inventory count, and more. Must-haves include the product name and/or description and keywords you want to trigger each product. If you prefer not to use keywords here you can, instead, use ad group and/or campaign parameters to specify which variation will be used.
Once you’ve built your sheet you need give it a good descriptive name and upload it to your Google Ads account. To do so, go to tools & settings / setup / business data. Add a new data source, choose ad customizer, and save it. Note that whenever you make changes to your sheet, you will need to upload a fresh version. To simplify this you can set a schedule to sync the sheet, such as every day at 6 AM.
Building Ads
Once you’ve got the datasheet synced you can start using that data to populate your ads automatically.
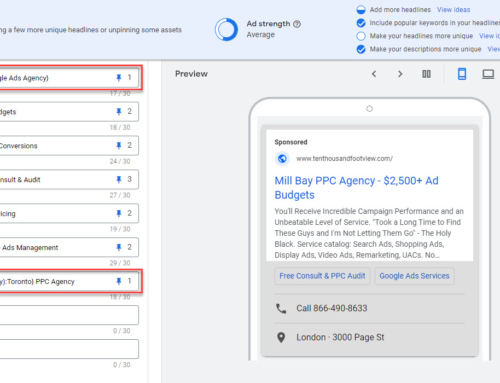
Go to one of your target ad groups and create a new ad. Where you want to use customized data insert an open curly bracket “{” and Google will display a drop-down menu of options. Choose the “ad customizer” option. Next, select your datasheet from the options provided. Finally, choose which field you want to show such as product name, sale price, or whatever. Continue to add different customized data to build up your entire ad structure.
Now repeat that for all of your different ad groups. That’s it, you’re done!
As a long as you maintain your sheet, you do not have to make any changes to your ads. Can you imagine if you have 2,500 SKUs? You just saved yourself about 100 hours of work!
Summary
Google is quickly moving us towards a time when we’ll all run fully automated Smart Shopping campaigns. But we’re not there yet.
If you’re having a tough time making your shopping numbers work or just can’t seem to scale, it’s time to take a look at one or more of these advanced shopping strategies. I hope you’ve found this article helpful, I do recognize some of this is pretty complicated. If you’d like some help with your shopping campaigns please get in touch with us.


