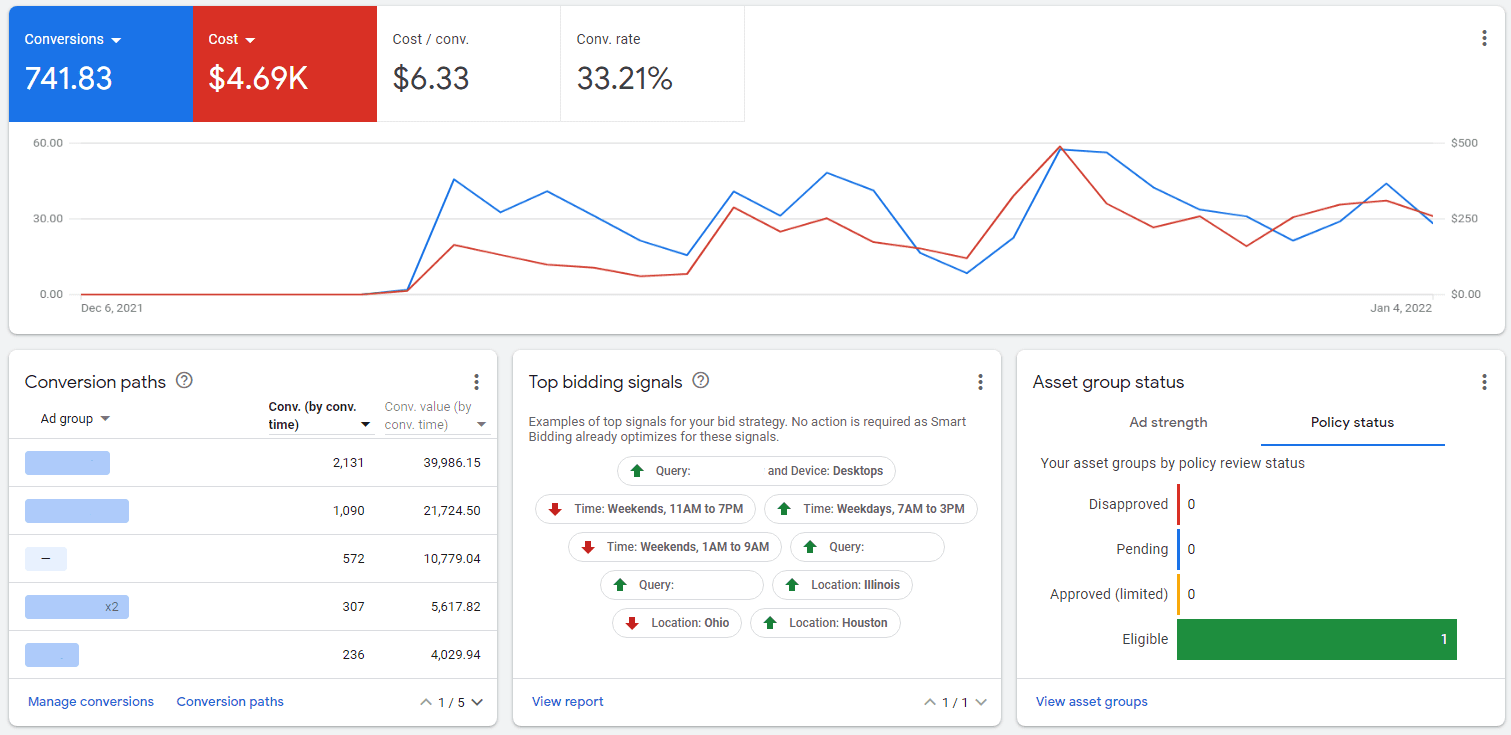
Google’s Performance Max campaigns are here! In this article, I’m going to discuss what Performance Max is, how it works, when you should use it, and how to set it up and optimize it for success.
Note: This article was updated on January 22nd, 2024
What is Performance Max?
Performance Max is a campaign format that incorporates all of Google’s ad inventory in one: Google Shopping, Google Search, Google Display Network (GDN), Google Discover (Newsfeed), YouTube, Gmail, and Maps.
The intention of Performance Max are three-fold. First, this is a replacement for Smart Shopping, which enhances that campaign type by including the ability to run ads further up the funnel to display/discovery/video inventory. Second, it is intended to supplement your existing paid search campaigns by expanding your reach across more inventory. Third, it’s also a good replacement for “Smart” campaigns as they deliver better overall results.
Here’s what we’d typically have to run in place of one Performance Max campaign:
- Dynamic search campaign
- Display campaign
- Discovery campaign
- Video campaign – optional as this can be incorporated into Display
- Smart Shopping campaign – launching sometime in 2022 but already available for some advertisers
- Smart campaigns – we never actually run these but you could replace this with P-Max
Performance Max campaigns are designed to generate conversions and use automated targeting informed by audiences you add. Performance Max is not appropriate for branding objectives nor can it be used to target specific audiences such as for remarketing.
In terms of search ads, Performance Max will run like dynamic search and can target any keywords you do not specifically target in existing search campaigns.
When Should You Use Performance Max?
Performance Max is ideal in the following situations:
a) Your total daily Google “display” ads budget is between $100 and $500
b) You already get a healthy volume of conversions through search ads and want to build on that
c) You are finding it difficult to scale up your existing search campaigns
d) You want to maximize conversion performance while minimizing your management time
e) You want to run shopping ads using Google’s best automated targeting/bidding solutions
When Should You Not Use Performance Max?
If you have large budgets assigned to video and display you should probably stick with campaigns specifically for those placements. Those specific campaign types (display, Discovery, Video) offer many more levers to pull with better control over creatives, and you can target audiences directly.
If you want to run campaigns specifically for branding or influencing decision making you should stick with campaigns that allow you to focus on those goals.
If you don’t yet have a robust paid search strategy in place Performance Max is probably not a good option for you.
Lastly, if you want to have granular control over your shopping ads you might want to continue running standard shopping instead of P-Max.
Building a Performance Max Campaign
There are some prerequisites before you start building a Performance Max campaign.
Placement Controls
First, you should set up inventory controls for your account. Go to “settings” and then choose “account settings.” Under inventory type I recommend choosing standard or limited inventory depending on your own brand standards. Particularly for B2B, I would lean more towards limited inventory. This will control the content types where your video ads can run.
Under excluded content, you should check any boxes as appropriate for your brand. This will block “sensitive” placements based on the display network.
Similarly, under excluded types and labels, you should check any content labels that aren’t appropriate for your ads. We almost always select DL-MA and unlabeled content options. As for content types, we usually block all of them except for below-the-fold content.
Negative Keyword Controls
First, P-Max will not target any keywords that appear in search campaigns that are eligible for auctions and exactly match the search query. That’s Google making it sound like P-Max won’t compete with your search campaigns. But the exact opposite is true. Only a tiny percentage of queries match keywords in most search campaigns, so P-Max is going to run head to head with search and take a bunch of traffic in the process.
With this in mind you can control negative keywords a few ways in P-Max. P-Max will adopt negatives from your accounts negatives list. This will apply to search, shopping, and display placements keywords. Importantly, this will also apply to all other campaigns in your account. If you want to apply specific negatives to your P-Max you can use the branded exclusions option. This is very useful if you don’t want to run any branded keywords in P-Max. Otherwise P-Max performance can be skewed to look amazing when, in fact, most of your conversions are coming from branded search while the rest of your ad spend is going to waste.
Lastly, you can reach out to your Google rep and ask them to apply a list of negatives you provide to the specific P-Max campaign of interest.
Goal Selection
You can now start building your Performance Max campaign.
Performance Max campaigns work with sales, leads, and website traffic goals. But since you will need to choose a conversion-based bidding method it really makes no sense to focus on website traffic. Once you choose your campaign goal you will be presented with your conversion goal options. In most cases, you should choose all of them, but there can be cases when you want to focus on a sub-set of account goals. Once you’ve selected your goals the Performance Max campaign type should appear as an option.
Budget and Bidding
I recommend setting a budget that’s at least 3x your average CPA or $100, whichever is larger. I do not recommend spending more than $1,000/day on a single Performance Max campaign. If you’re going to spend that kind of money on display campaigns you should be investing the time into building out more specific dynamic search, display, video, and Discovery campaigns. That will give you much more granular control over spending, targeting, and creative strategy.
In terms of bidding strategy, there are four Smart bidding options:
- Maximize Conversions
- Maximize Conversion Value
- tCPA
- tROAS
Here’s a detailed article that fully explains which of these bidding strategies you should choose based on your business goals.
If you do choose tCPA or tROAS you should probably go along with what Google recommends, or choose a higher tCPA / lower tROAS to ensure your campaign serves a healthy volume of clicks and spends your budget. You can always adjust these numbers once things get rolling.
You’ll notice as you add your budget and bid that Google will show you estimated results. These numbers will be refined and you continue to build out your campaign.
You may also wish to optimize your bids for new customers or set value-rules. These are advanced strategies, you should fully understand how these work before implementing them.
Campaign Settings
As with all campaigns you need to choose your location targets and languages as well as advanced targeting settings. If you have a large list of locations to add you might want to consider using Google Ads Editor to set those up. For example, we have one client with over 500 radius targeting/coordinates targets. Inputting these one by one won’t be fun.
As Google has enhanced P-Max over time they’ve added the ability to block placements directly in P-Max campaigns. You might want to copy over any placements you have blocked elsewhere into P-Max as a starting point.
Store locations, dynamic ads feeds, page feeds, and Merchant settings are all self-explanatory if you want to use those options.
One of the most important settings to configure is the “automatically created assets” options. We always uncheck the text assets option. Google still doesn’t do a very good job of creating ad copy. For every 2-3 good ad copies it’ll spit out 1 terrible one.
For URL expansion you can choose whether to run ads for your entire website, a website with URL exceptions or specific URLs you include directly in your ads (turn off URL expansion). If you have one or more specific landing pages I strongly recommend only targeting those. If you have a large eCommerce site it may make sense to run ads universally, but I would still exclude non-product and non-product category pages. Note that you can exclude specific URLs or create rules to block URLs. For example, you could exclude entire sections of your site or product categories using keywords that appear in those URLs.
Also, if you’re running shopping ads Google will automatically include ads to those products from your asset group(s).
Before moving past this screen make sure you open up “more settings” to reveal more campaign settings. Here you can set start/end dates for your campaign, set ad schedules, and add a tracking template if needed.
Asset Groups
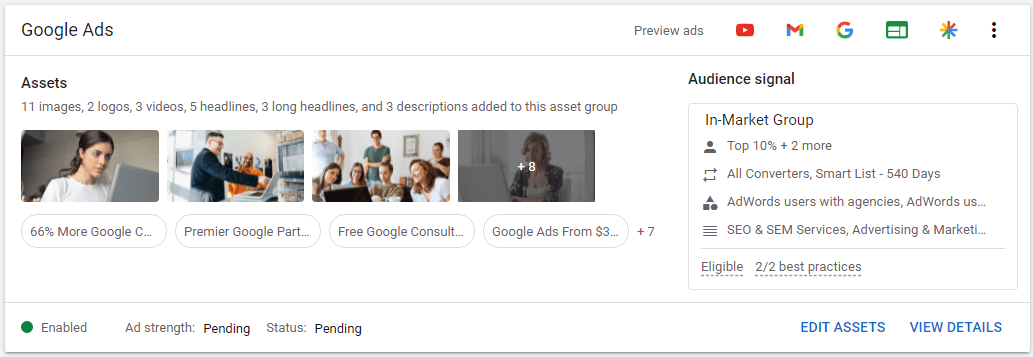
In this section, we’ll create what we’ve all come to know as ad groups. Each asset group contains one Responsive style ad and one Audience Signal. If you want to target different audiences or create different offers, this is how you’ll separate those in the campaign.
Responsive Ad
By now you should be very familiar with Responsive Ads. That said, each Responsive ad type has certain nuances you need to be aware of.
The Final URL is your primary target page. If you’ve turned off URL expansion this is the only page your ads will point to. If you have URL expansion turned on, Google will point ads to other pages of your site.
For images, you have the ability to add up to 15 total. Aspect ratio options include landscape, square, and portrait. You can see the exact requirements by highlighting the “?” icon on the add images dialogue box. These are the same requirements that you’ll see for Responsive Display Ads (RDAs). Likewise, you have several ways to capture or upload images here.
I recommend focusing mainly on landscape and square images, but always include at least a couple of portrait shots.
Next, you need to add your logo(s). At least one square logo is required while a landscape 4:1 version is optional but recommended.
You may, optionally, upload up to 5 videos from Youtube. I strongly recommend using your own video content here. If you do not upload videos Google will create simple videos from images which is a pretty poor option in my opinion. I’d say if you don’t have any videos that you should avoid running Performance Max campaigns.
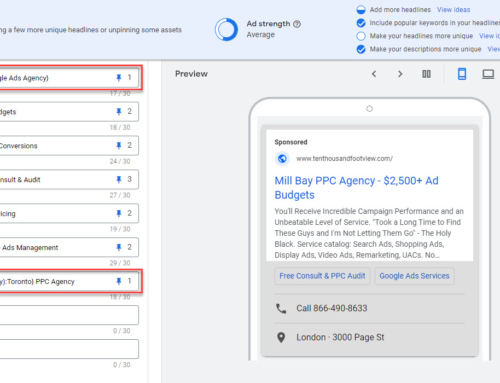
Next, you will add your headlines 5 x 30 characters, long headlines 5 x 90 characters, and descriptions 1 x 60 characters and 4 x 90 characters. Before starting on your copywriting it’s crucial to understand how the different placements come into play with respect to combining different headlines and descriptions.
Fortunately, Google provides a preview tool for each placement type. Spend some time to review how your ad copies are fitting together and ensure it makes sense in every placement before proceeding. This can be a bit tricky as you want to include a call to action in your ad copy for search ads, but there’s an automated call to action already included for image ads. As always, follow best practices for Google Ads copywriting.
For your call to action, you may choose a completely automated option or choose a specific one.
Next, you need to include your business name; pretty straightforward operation I would hope.
Finally, you may add one or two display paths to append to your final URL. These will appear in search ads.
Audience Signal
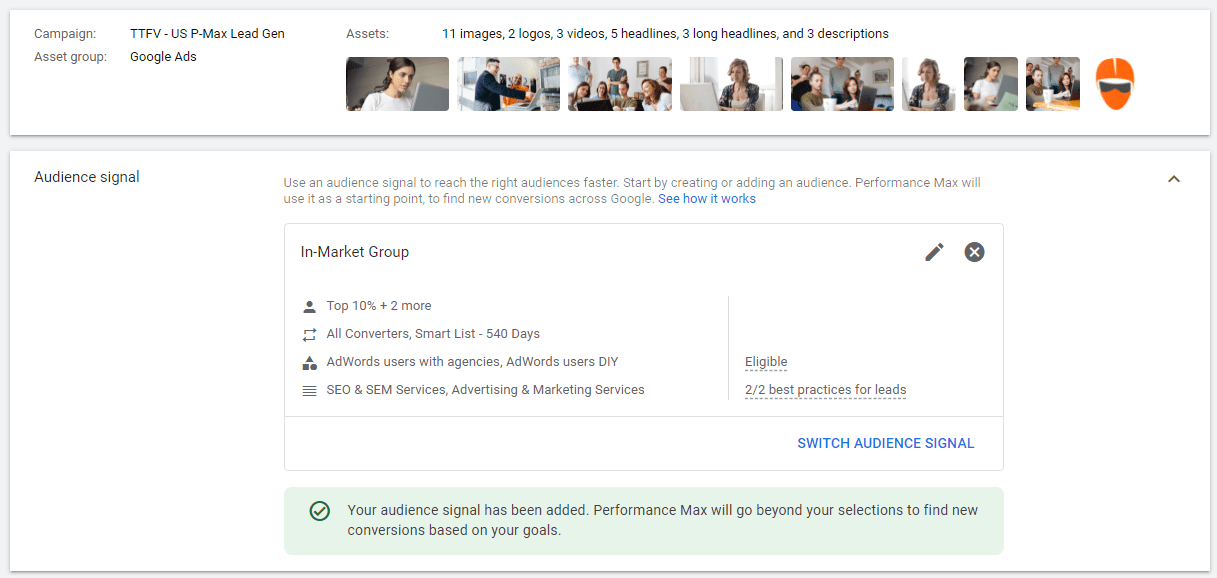
Now that you’ve created your ad, you need to inform Google what your audience looks like. Start by creating a new audience. This is where it may be a bit confusing. In the context of Performance Max campaigns, an “audience” is a combination of existing audiences and demographics you select. More specifically you can add audiences in each of these sections:
- Custom segments – custom audiences you’ve previously created based on search activity, websites visited and apps used
- Your data – uploaded customer lists and website visitors, aka remarketing lists
- Interests and detailed demographics – in-market, advanced demographics such as company size, and life events
- Demographics – which ages, genders, parental status, and income levels to target or exclude
When finished you will give your new “audience” a name and save it.
It’s very important to understand that adding any of the targets above does not mean Google is going to specifically target them or exclude anybody. Google will use all of this information to inform targeting.
Search Themes
Currently in Beta but available to many advertisers, search themes allow you to add up to 25 broad match keywords that are relevant to the campaign. This will help steer your asset group towards those specific keyword themes, which is super helpful if you don’t have your landing pages buttoned up. I strongly recommend using this feature if you have it available in your account. As for which keywords to include, choose those with high performance and volume.
Assets (Formerly Extensions)
This is the final step in Performance Max campaign creation.
Here you can optionally add any/all ad extensions that you feel are appropriate for the campaign. For the most part, these will mainly only run on search placements, but there are some exceptions. I highly recommend using all the extensions you can, let Google figure out which ones are driving conversions and self-optimize accordingly. Note these will be added automatically if you’ve implemented extensions at the account level, which is preferred to common assets/etensions.
Listing Groups
Listing groups control which products you wish to advertise from your shopping feed. Note that you can match your listing groups to your asset groups. In terms of organizing products, it’s recommended to divide by product_type or other broad categories. For example, if you sell home furnishings you might run separate asset and listing groups for lamps, coffee tables, and recliners. You may also want to divide products into multiple P-Max campaigns if you have substantial budget and need to target a different tROAS based on different product goals or margins.
Product selection is pretty straightforward and follows the same approach you’re accustomed to in Smart and Standard shopping campaigns.
Campaign Summary
Once you’re done Google will provide a summary and display any issues you need to resolve. Once you’re satisfied you’re ready you can go ahead and publish your campaign.
Optimizing Performance Max Campaigns
There aren’t many levers to pull in Performance Max. And, you should count on a few weeks from launch before you’ll be able to get asset reporting from Google.
Adjusting Asset Sets
Keep an eye on your budget and CPA or ROAS per asset set. Some asset sets may work better than others. Consider replacing poor performing sets with new ones. This may include making brand new offers or changing target audiences. I recommend against adjusting audiences or offers on the fly.
Instead of that, duplicate the asset set and make adjustments in the new version. Consider running these asset sets simultaneously against your originals to see whether the changes improve performance.
Adjusting Creatives
Creative optimization works the same as for Responsive Search Ads.
Google will show you the “highest performing” combinations, those that are shown most often. You can get an idea from this as to what overall messaging is hitting home with your audience. And, you can view performance ratings for each ad element, be it a headline, long headline, description, image, logo, or video.
Swap out your lower-performing elements with new ones to improve your overall performance. But stay on theme. If you find that you want to modify your offer it’s time to create a new asset set.
Adjusting Asset Set Audiences
You can swap in a Performance Max audience you’ve already created, create and apply a new Performance Max audience, or edit the existing Performance Max audience. But as I mentioned above, I would always create a new asset set, otherwise, it’ll be difficult to keep track of what changes were made and what’s causing increases or decreases in performance. Also, once Google learns what audiences work well it’ll tend to ignore your initial audience signal anyway.
Placements
Unlike display and video campaigns, there is no “built-in” way to review the placements your ads ran on directly within the Performance Max campaign. Instead, you’ll need to run a Performance Max Placements report. Google does offer instructions for that right here.
Thus far, our client campaigns run almost 100% in Google Owned Properties. Unfortunately, Google doesn’t provide detailed breakdowns on those. As for the 3rd party display network, you get a basic impressions report, which really isn’t that useful. But you can add any that seem out of context to your exclusions list in P-Max or at the account level.
Summary
Performance Max campaigns are a great option when you have a medium-sized budget and want to expand on your already effective search campaigns. The are also the defacto replacement for Smart Shopping. Follow the best practices in this article and you should see incremental conversions and a nice boost to brand awareness for your business.


