There’s a huge body of Google Ads knowledge circulating on the web if you know where to look. You can find training, guides, tips, advice and more. Today I’m going to give you a few little Google Ads hacks that you, most likely, haven’t heard of.
Note: This article was updated on July 30th, 2023
1. Add the CPI (Conversions per Impression) Metric to Your Ad View Columns
Pro agencies (including mine) use CPI as a primary metric for ads split testing. A full explanation of the theory and implementation is provided in this great post from Adalysis. In a nutshell, the metric accounts for CTR as well as CR when calculating ad performance. This matters, because ads with both a better CTR and better CR can drive more conversions. Another way to look at it is there are a limited number of searches for your offer. If you only optimize for conversion rate or cost/conversion you may be limiting potential click volume, and hence conversion volume.
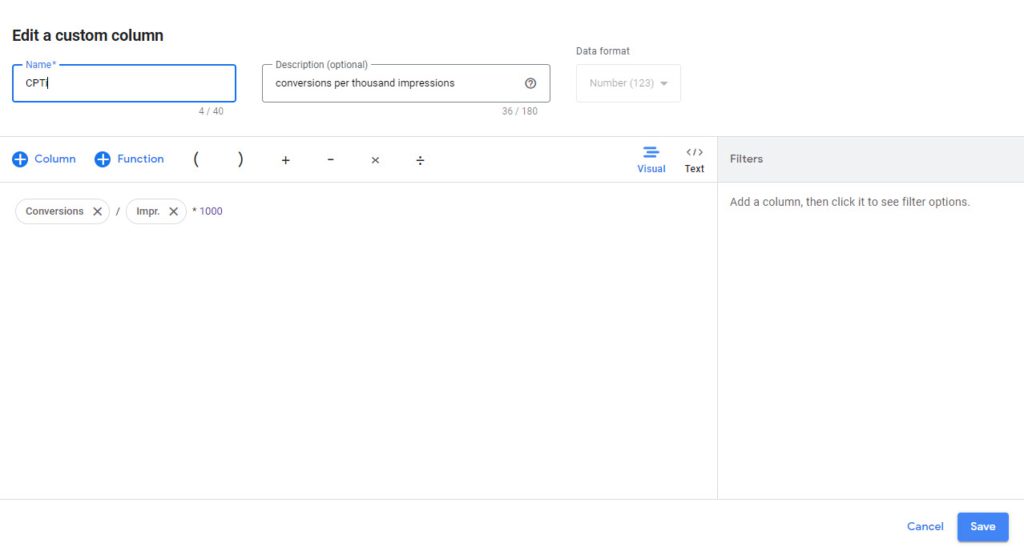
Great, so let’s use it. Google doesn’t provide CPI as a standard column, but no problem, we can implement this with the custom column feature. Go into your ads view and add a custom column. Create a friendly name such as CPT and description. Add the “Conversions” metric, a divide symbol, and Impr. In this example (optional), we also multiply by 1,000, which can make the numbers a little easier to compare visually, i.e. not so many zeros to the right of the decimal.
Once you have this set up you’ll want to save the column set so you don’t have to activate this every time you come back to the ad view in a new ad group or campaign. If you’d prefer to put this whole thing on autopilot you might consider installing this great free ad split testing script from Karooya. As always, review all 3rd party scripts carefully before installing!
2. Set Your Campaign Date to Start Tomorrow
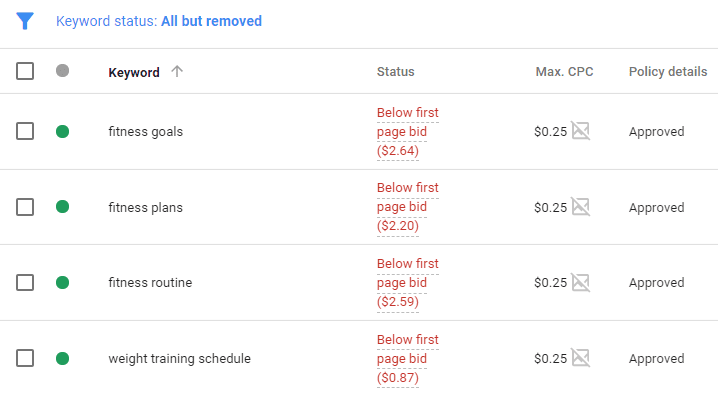
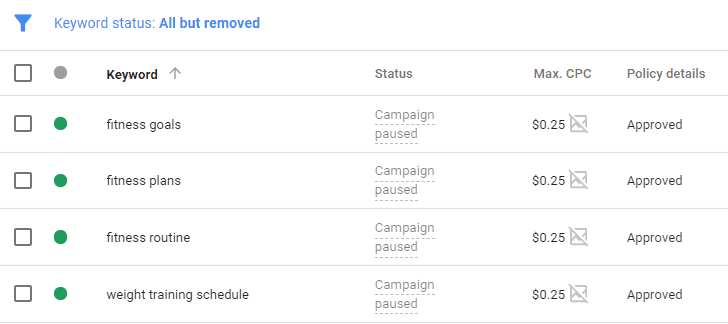
One common problem with campaign development is that you don’t want to start serving ads until you’re good and ready. There are a few different ways we routinely deal with this. The most obvious solution is to simply pause the campaign during development. But this causes a few problems. First, you won’t be able to see keyword status so this:
Becomes this:
This is a big problem because you won’t know how to properly set your keyword bids or notice if your keywords are getting the dreaded “low search volume” message. This problem persists, also, if you pause the ad group or keywords. To combat this problem, most of us temporarily turn the campaign on so that we can tune bids, and then quickly turn it back off again. Sometimes we do get a few impressions or even clicks, not the end of the world but still inconvenient. There is a workaround for this, which is to pause your ads, but that’s a bit kludgey, right?
There’s also a second problem. If you need a campaign to be reviewed by your client or another party, it can sometimes be a little difficult for them to find it in large accounts when it’s paused. Yep, I totally get that you’ve emailed them the campaign name and all, but never-the-less, this does seem to cause issues for “non-Google Ads” types.
Here’s my own homegrown solution. When you create your campaign set the start date ahead at least a day, or more if you anticipate needing more time to fully bake and launch your handiwork. This way you can keep all elements active and the campaign will start running as soon as you hit your start date. And, if you want to manually launch just remove the start date for your campaign to run immediately.
3. Add Branded Keywords to Boost Your Quality Scores
It’s a fact that Google Google Ads accounts have account-level quality scores based on historical performance. Yes, I’ve heard this from Google employees, and no I’m not going to ever say who. An easy (albeit not so quick) way to increase your overall quality scores is to boost your account or campaign-level score by adding branded keywords.
It’s super easy to score 9-10 with your own brand pointing to almost any page on your site. And, you’ll see higher average CTRs raising your average ad rank. Run these for a while and you’re likely to see your quality scores improve elsewhere. Keep in mind, however, that adding one or two branded keywords isn’t going to improve a 10,000-keyword account. I also recommend cleaning up any low-quality score keywords that are dragging you down as well as following a best-practices-based approach to increase QS.
4. Collaborative Placement Exclusions List
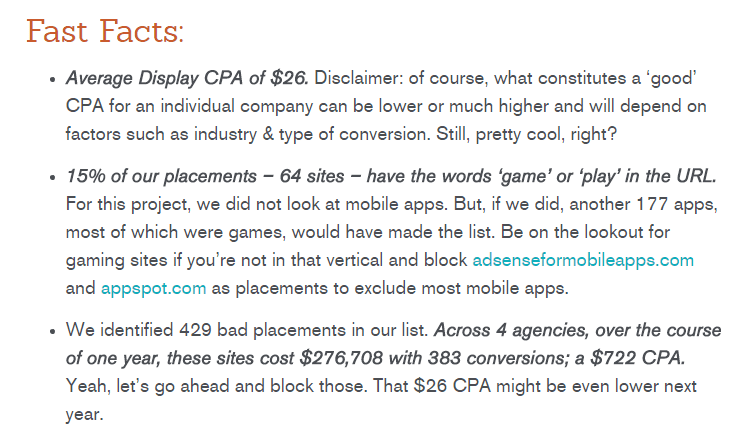
Back in 2015 Seer, Panafin, Distilled, and Wistia agencies got together and crunched a large set of their combined GDN placements data. The result was they discovered over 400 low-quality placements that could be “safely” blocked by most advertisers. They then published the list for all to use freely. If you need a little bump in GDN conversion performance you should download and install this list globally… do it right now!
Google has recently launched the ability to share and sync dynamic exclusion lists. We haven’t seen any 3rd parties sharing dynamic lists just yet but it’s only a matter of time.
5. Use Bold Text in Your Ad Description Copy
This little trick currently works but may not forever, so use it at your own risk.
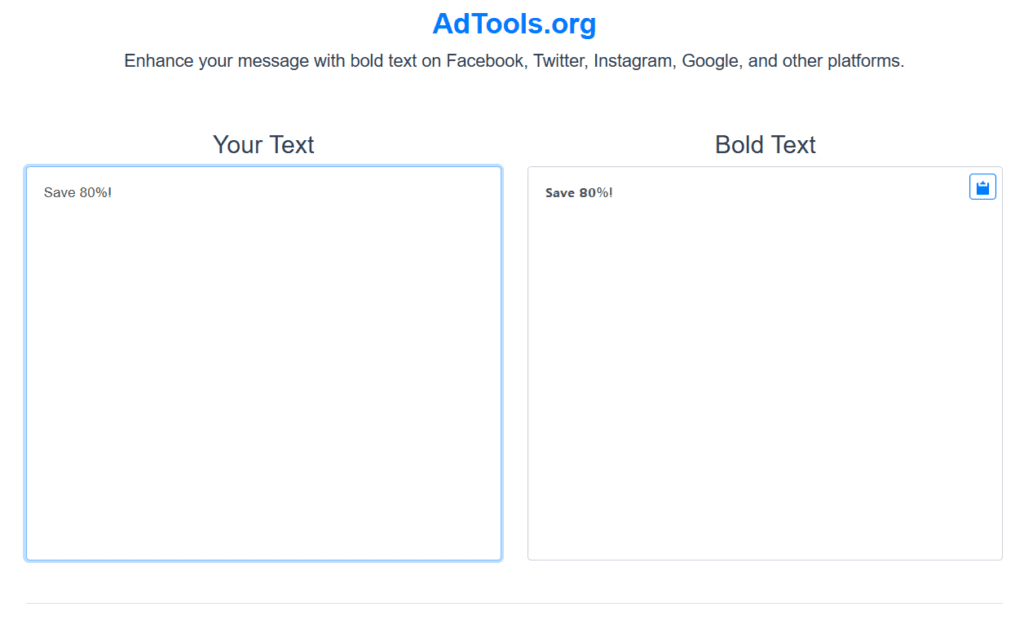
To convert regular text to bold text go to http://adtools.org/ and input your copy. Highlight and copy (CTRL+C) the bold copy output and paste it into the description section of your search ad. You’re done!
One important thing to remember is that bold characters take up 4 spaces each. This means you’ll need to use this hack sparingly and you’ll have fewer characters to work with.
Besides Google Ads, you can use the bold text from this tool in several other ad platforms such as Facebook and Twitter Ads.
BONUS – Use the Same URL in Multiple Sitelinks
Google restricts you from using the same URL more than once in Sitelink extensions. Conceptually, Google wants to prevent you from sending users to the same content from multiple links in the same ad. This aligns with their “good user experience” philosophy.
But from an advertiser experience, Sitelinks are a powerful way to beef up your ad visually and to generate higher CTRs. At the same time, who wants to send potential customers to low converting contact or about us pages, right?
To get around this restriction, you can simply include different section links in your URLs. Section links are added to the end of URLs and look like this https://domain.com/page#section-link.
The link is supposed to reference a section of the page, and the page should have a corresponding tag. When you click on this link you are taken to the page and your browser will automatically scroll to the section indicated.
Now with this in mind, you can easily add sections to your landing page and call those out in Sitelinks with section links; users will all end up on the same landing page regardless of what Sitelink they click. You can also simply add random section links that don’t correspond to landing page tags. In this case, the user will simply end up at the top of the page. For example, you could have Sitelinks like this:
- Special Offer – https://domain.com/page#special-offer – Check out our special limited time offer
- Product Information – https://domain.com/page#product-info – Get all the details about our latest product version
- Pricing Tiers – https://domain.com/page#pricing – We offer several different pricing tiers, learn more here
Ideally, you would link to each section to ensure the best user experience, but that is totally optional.
Summary
I hope you find these Google Ads hacks useful for your PPC journey. If you’d like to take your Google Ads to the next level, let’s talk. We can arrange a complimentary audit to boost your ROI.

